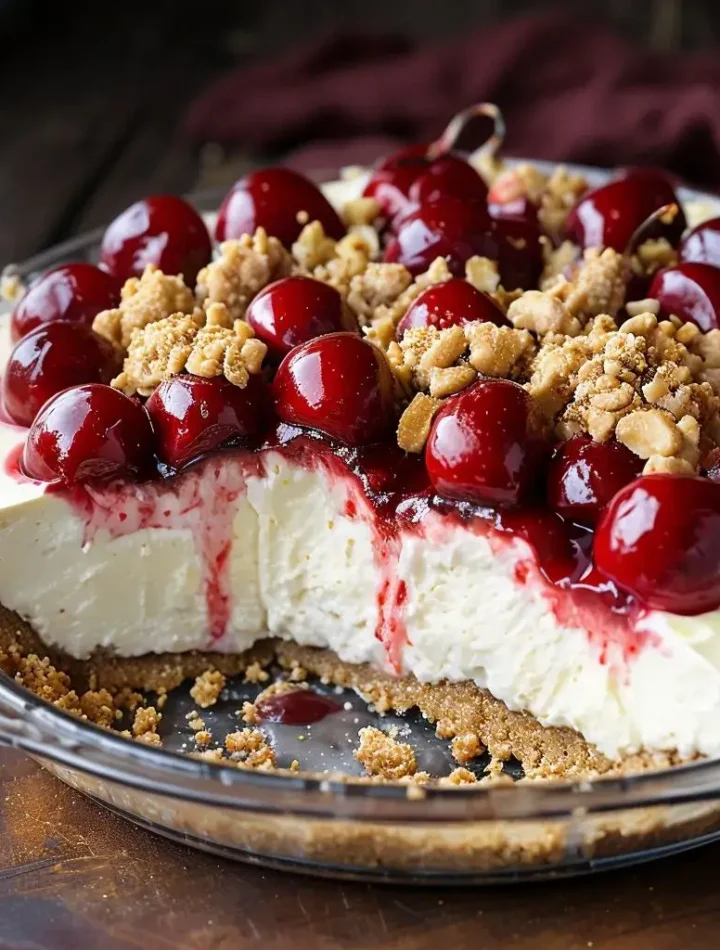
Cherry Cheesecake Lush Dessert is a delightful and creamy treat that combines the classic flavors of cheesecake with the refreshing taste of cherries. This dessert is not only visually appealing but also incredibly satisfying, making it a perfect choice for gatherings, celebrations, or simply a sweet indulgence at home. Its layered structure and creamy texture create a heavenly experience that draws everyone in, whether you’re a novice baker or a seasoned pro.
Ingredients
To create this luscious dessert, you’ll need the following ingredients:
For the Crust:
- 1 ½ cups graham cracker crumbs
- ⅓ cup granulated sugar
- ½ cup unsalted butter, melted
For the Cream Cheese Layer:
- 8 oz cream cheese, softened
- 1 cup powdered sugar
- 1 cup whipped topping (like Cool Whip)
- 1 tsp vanilla extract
For the Cherry Layer:
- 1 can (21 oz) cherry pie filling
- 1 tbsp lemon juice (optional)
For the Topping:
- 1 cup whipped topping (for garnish)
- Fresh cherries or chocolate shavings (optional, for garnish)
Step-by-Step Directions for Preparation
Step 1: Prepare the Crust
- Preheat the Oven: Preheat your oven to 350°F (175°C).
- Mix the Ingredients: In a medium bowl, combine the graham cracker crumbs, granulated sugar, and melted butter. Stir until the crumbs are evenly moistened.
- Press into Pan: Press the mixture firmly into the bottom of a 9×13-inch baking dish to form an even layer.
- Bake: Bake the crust in the preheated oven for 10 minutes. Remove from the oven and allow it to cool completely before adding the cream cheese layer.
Step 2: Make the Cream Cheese Layer
- Beat the Cream Cheese: In a large bowl, beat the softened cream cheese with an electric mixer until smooth and creamy.
- Add Sugar and Vanilla: Gradually add the powdered sugar and vanilla extract, mixing until well combined.
- Fold in Whipped Topping: Gently fold in the whipped topping until the mixture is smooth and fluffy.
- Spread on Crust: Pour the cream cheese mixture over the cooled crust, spreading it evenly with a spatula.
Step 3: Add the Cherry Layer
- Combine Cherry Filling: In a separate bowl, mix the cherry pie filling with lemon juice (if using). This adds a bit of brightness to the flavor.
- Spread Over Cream Cheese Layer: Carefully spoon the cherry filling over the cream cheese layer. Use a spatula to spread it evenly.
Step 4: Chill and Serve
- Chill the Dessert: Cover the dish with plastic wrap and refrigerate for at least 4 hours, or overnight if possible. This allows the layers to set and meld together beautifully.
- Add Topping Before Serving: Just before serving, spread the remaining whipped topping over the cherry layer. You can also garnish with fresh cherries or chocolate shavings for an extra touch.
Step 5: Slice and Enjoy
- Cut into Squares: Use a sharp knife to cut the dessert into squares. Serve chilled, and enjoy the creamy, fruity goodness!
Serving and Storage Tips
Serving Tips
- Presentation: For a beautiful presentation, serve the squares on individual dessert plates with a dollop of whipped topping and a fresh cherry on top.
- Pairing Suggestions: This dessert pairs wonderfully with coffee, tea, or a glass of cold milk.
Storage Tips
- Refrigeration: Store any leftovers in the refrigerator, covered with plastic wrap or in an airtight container. It will keep well for up to 3-5 days.
- Freezing: While not ideal, you can freeze the dessert for up to a month. To freeze, slice the dessert and wrap individual pieces tightly in plastic wrap, then place them in a freezer-safe container. Thaw in the refrigerator before serving.
Creative Variations on the Basic Recipe
- Chocolate Cherry Lush: Add chocolate pudding as an additional layer between the cream cheese and cherry layers. Use crushed Oreos instead of graham crackers for the crust for a chocolatey twist.
- Berry Mix Lush: Swap the cherry pie filling for a mix of your favorite berries (strawberries, blueberries, and raspberries) for a refreshing summer version.
- Peach Cheesecake Lush: Replace the cherry filling with peach pie filling for a different fruity flavor. This works especially well in the summer when peaches are in season.
- Nutty Crunch: Incorporate chopped nuts such as pecans or walnuts into the crust mixture for added texture. You can also sprinkle some on top for garnish.
- No-Bake Version: For a no-bake version, skip the baking step for the crust. Combine the crust ingredients and chill it in the refrigerator to set instead.
FAQ Section
Q1: Can I use low-fat cream cheese?
A1: Absolutely! Low-fat cream cheese can be used without sacrificing too much flavor. However, the texture may be slightly different.
Q2: How can I make this dessert gluten-free?
A2: Use gluten-free graham crackers or almond flour for the crust. Ensure all other ingredients are gluten-free as well.
Q3: Can I make this dessert ahead of time?
A3: Yes! This dessert is perfect for making ahead. It tastes even better after being chilled for a day or two as the flavors meld together.
Q4: What if I don’t have whipped topping?
A4: You can substitute homemade whipped cream. Just whip heavy cream with a bit of sugar until soft peaks form.
Q5: How do I store leftovers?
A5: Store any leftovers in the refrigerator, covered well. Enjoy within 3-5 days for the best texture and flavor.
Conclusion
The Cherry Cheesecake Lush Dessert is a versatile and delicious treat that pleases both the eyes and the palate. Whether you stick to the classic recipe or explore the creative variations, this dessert is sure to impress your family and friends. The combination of creamy cheesecake, sweet cherries, and a crunchy crust makes it a delightful addition to any table. So, roll up your sleeves and dive into this delightful dessert—you won’t regret it! Happy baking!

