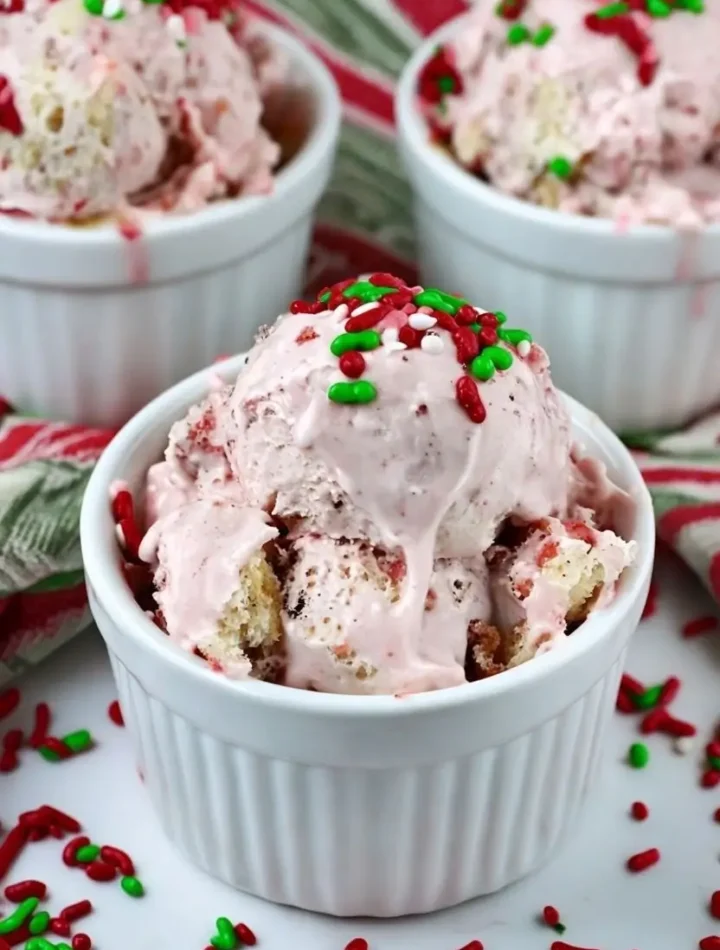
The holiday season is a time of joy, celebration, and, of course, delicious treats! Among the myriad of festive desserts, Christmas Ice Cream stands out as a delightful and refreshing option. Imagine creamy, dreamy scoops infused with the flavors of the season—peppermint, gingerbread, and rich chocolate—that can be enjoyed by everyone, from kids to adults. Not only is it a scrumptious addition to your holiday dessert table, but it also doubles as a cool treat to counteract the warmth of festive gatherings. In this guide, we’ll walk you through creating this delightful dessert, share variations to impress your guests, and answer common questions you might have along the way.
Ingredients
To make your homemade Christmas Ice Cream, you’ll need the following ingredients:
Base Ingredients:
- 2 cups heavy cream: This will give your ice cream a rich, creamy texture.
- 1 cup whole milk: Adds a lighter texture and balances the creaminess.
- 3/4 cup granulated sugar: Sweetens the mixture; feel free to adjust based on your taste.
- 1 tablespoon pure vanilla extract: Enhances the flavor profile.
- 1/2 teaspoon salt: Balances the sweetness.
Flavoring Ingredients:
Depending on the flavor you want to create, you can use:
- Peppermint: 1/2 cup crushed peppermint candies and 1 teaspoon peppermint extract.
- Gingerbread: 2 teaspoons ground ginger, 1 teaspoon ground cinnamon, and 1/4 teaspoon ground nutmeg.
- Chocolate: 1/2 cup cocoa powder or 1 cup melted chocolate.
- Eggnog: 1 cup eggnog instead of milk.
- Cranberry: 1 cup cranberry sauce mixed in.
Step-by-Step Directions for Preparation
Step 1: Prepare the Base
- Combine Ingredients: In a mixing bowl, whisk together the heavy cream, whole milk, granulated sugar, vanilla extract, and salt until the sugar is completely dissolved. This will be the base for your ice cream.
- Flavor It Up: Choose your desired flavor from the list above and incorporate the relevant ingredients. For example, if making peppermint ice cream, add the crushed peppermint and peppermint extract into the mixture.
- Chill the Mixture: Cover the bowl with plastic wrap or a lid and refrigerate for at least 2 hours, or until thoroughly chilled. This step is crucial for a smoother texture.
Step 2: Churn the Ice Cream
- Prepare Your Ice Cream Maker: Follow the manufacturer’s instructions for your ice cream maker. Typically, this involves freezing the bowl for several hours or overnight.
- Churn: Pour the chilled mixture into the ice cream maker and churn according to the manufacturer’s instructions, usually about 20-25 minutes, until it reaches a soft-serve consistency.
Step 3: Freeze the Ice Cream
- Transfer to a Container: Once churned, transfer the ice cream to an airtight container. Use a spatula to smooth the top.
- Freeze: For a firmer texture, freeze for at least 4 hours, or until solid.
Serving Tips
- Scoop with Warmth: Run your ice cream scoop under warm water before scooping to make serving easier.
- Garnish: Top each scoop with festive garnishes such as crushed candy canes, chocolate chips, or whipped cream for a beautiful presentation.
- Pairing: Serve alongside warm desserts like brownies or gingerbread cookies for a delightful contrast.
Storage Tips
- Airtight Container: Store your ice cream in an airtight container to prevent freezer burn and maintain creaminess.
- Layering: If you’re making multiple flavors, separate each layer with parchment paper to avoid mixing.
- Duration: Homemade ice cream is best enjoyed within 1-2 weeks for optimal texture and flavor, but it can last up to a month in the freezer.
Creative Variations on the Basic Recipe
- Peppermint Bark Ice Cream: Incorporate crushed peppermint bark and swirl in a chocolate fudge sauce for extra indulgence.
- Eggnog Ice Cream: Substitute the milk for eggnog and fold in nutmeg and cinnamon for a classic holiday flavor.
- Gingerbread Cookie Dough Ice Cream: Add chunks of gingerbread cookie dough and a swirl of molasses for a festive twist.
- Cranberry Swirl Ice Cream: Fold in homemade cranberry sauce for a tart and sweet flavor burst.
- Chocolate Mint Chip: Mix in mini chocolate chips and a hint of mint extract for a refreshing treat.
FAQ Section
Q1: Can I make Christmas Ice Cream without an ice cream maker?
A: Yes, you can! Simply pour the mixture into a shallow dish and freeze. Every 30 minutes, stir the mixture with a fork to break up ice crystals until it’s fully frozen.
Q2: How can I make my ice cream smoother?
A: Chilling your base before churning and ensuring your ice cream maker bowl is properly frozen will help achieve a smoother texture. Additionally, churning for longer can incorporate more air, making it fluffier.
Q3: What’s the best way to store homemade ice cream?
A: Store it in an airtight container and place a layer of plastic wrap directly on the surface to prevent ice crystals from forming.
Q4: Can I use alternative milks for a dairy-free version?
A: Absolutely! Use coconut milk for a rich, creamy texture or almond milk for a lighter version. Just ensure to adjust the sweetness as needed.
Q5: How long will homemade ice cream last in the freezer?
A: It’s best enjoyed within 1-2 weeks, but it can last up to a month if stored properly.
Conclusion
Christmas Ice Cream is not just a seasonal dessert; it’s a delightful way to celebrate the flavors of the holidays while enjoying a cool treat. With its versatility, you can customize it to fit your preferences or impress your guests with unique variations. Whether you stick to classic flavors or experiment with creative twists, making your own ice cream can be a fun and rewarding experience. So gather your ingredients, channel your inner ice cream maker, and enjoy the festive spirit with every scoop!

